
Managing an issue is how you move it from first raised through to resolved, keeping its status, actions, and history up to date so your register reflects reality. A clear status workflow guides this process and prevents issues from being closed prematurely. Working issues to completion matters because an open issue continues to weigh on your risk and Cyber Resilience scores until it is genuinely resolved or formally accepted.
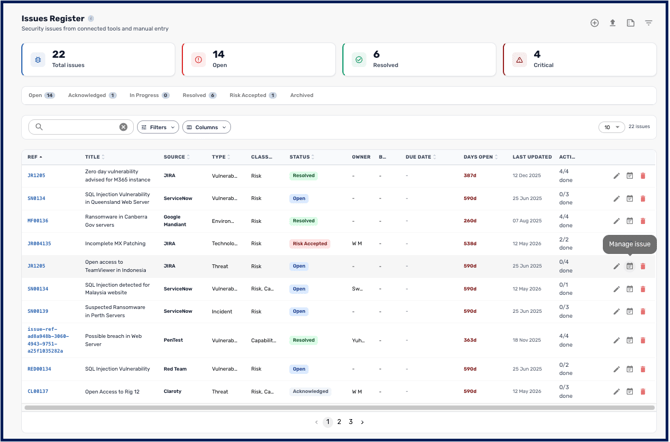
- From Catalogue > Issues, find the issue and open it using the Manage issue, or click the row to preview it in the Quickview drawer first.
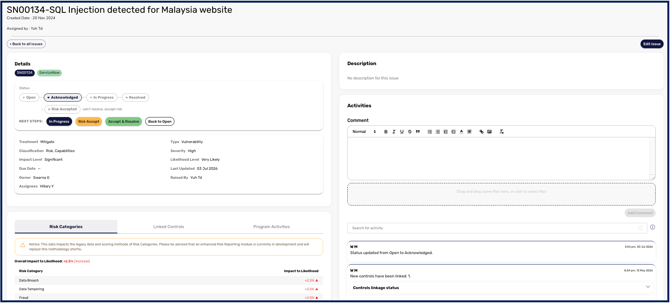
- Progress the issue through the status bar: Open, then Acknowledged, then In Progress, then Resolved or Risk Accepted. Acknowledged and In Progress let you show that an issue has been picked up and is being worked, before it is closed out.
-
2. Progress the issue through the status bar: Open, then Acknowledged, then In Progress, then Resolved or Risk Accepted. Acknowledged and In Progress let you show that an issue has been picked up and is being worked, before it is closed out.
A sixth status, Archived, sits outside that flow. Archiving takes an issue out of your working register without closing it, which suits duplicates or issues raised in error. Archived issues remain available under their own tab and can be brought back.Archiving is not the same as deleting. Deleting an issue removes it from view everywhere, whereas archiving simply moves it aside. Archiving also discards the issue's outcomes, so if you set the issue up to raise a control's score or advance a program activity when it resolved, those instructions are dropped. Resolve rather than archive if you want those effects to happen.
- Add comments for context and attach files as evidence where needed. These, along with status and action changes, are recorded in the issue's activity log, so you keep a full history.
- Close the issue in one of two ways. Choose Resolved when remediation is complete, or Risk Accepted to close it regardless of outstanding actions when you have decided to accept the risk. When accepting, you can set a re-open date that automatically reopens the issue on that day and emails the relevant users, which is useful for time-bound acceptances.
- When you're done Click Save Changes to apply your updates and record them in the activity log.
A reminder goes out seven days before a risk acceptance expires, so the reopening is not a surprise. If the acceptance still holds, extend the date before it lapses rather than letting the issue reopen and closing it again.
Closing an issue can change a vendor's status. If the issue is linked to an entity assessment currently sitting in Provisional Acceptance, closing the issue can move that assessment out of provisional and update the entity's overall status with it. Check what an issue is linked to before closing it, particularly if you are working through a backlog.
By keeping each issue's status and actions current, your Issues Register stays trustworthy and your risk and resilience scores reflect the true state of remediation. Since Release 2.7, the controls linked to an issue also feed into risk control effectiveness, so reviewing an issue's linked controls before you close it helps keep your residual risk scores accurate.
To better understand exactly how issues impact your control maturity and risk, see Understanding the Impact of Issues on Risk.