
Your team may need additional workspaces if it functions with independent sub-units within your organisation, allowing your team to securely separate different aspects of the business, such as specific business units, subsidiaries, geographic locations, or partners.
Creating separate workspaces is crucial for some teams because each workspace acts as an independent entity, meaning each area of the business can maintain its own primary security framework, capability assessments, and reporting tailored to its unique operational requirements. For example, a European workspace complying with GDPR separately from Australian AESCSF requirements, or even for distinguishing actions by state.
How to Create a New Workspace
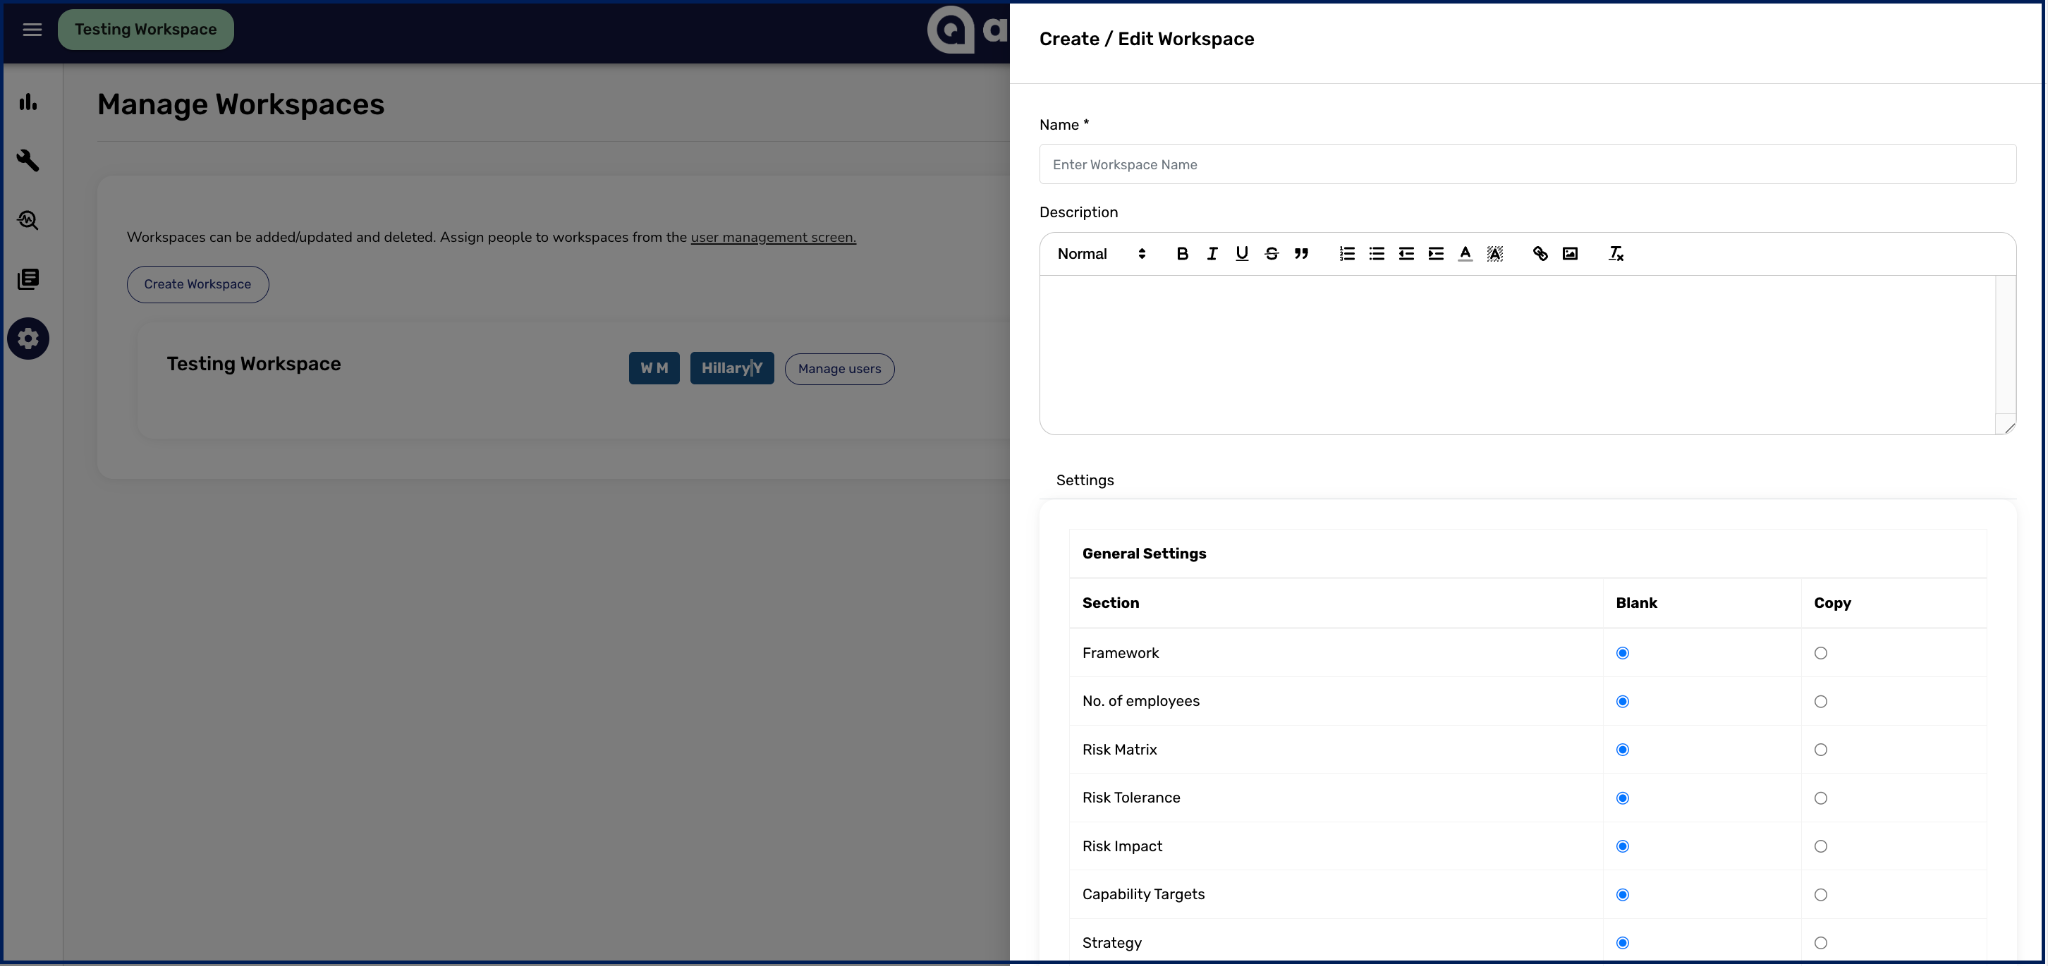
- On the left-hand navigation menu, click on Settings > Workspaces.
- In the Manage Workspaces section, click the Create Workspace button.
- Enter a Workspace Name and a Workspace Description.
- Under the General Settings and Assessments tabs, configure your new workspace by choosing to either start Blank (requiring you to fill in all settings manually) or Copy (which pre-fills the settings based on the parent workspace).
- Click Save to create the workspace, keeping in mind that initialization can take 5-10 minutes.
How to Delete a Workspace
- On the navigation menu, click on Settings > Workspaces to view a list of your assigned workspaces.
- Click the Edit workspace details icon next to the specific workspace you wish to delete.
- In the popup window, scroll to the bottom and click Delete Workspace.
- A Confirm Delete warning will appear; select “I understand. Delete this Workspace” to permanently remove it.