
Creating an issue records a security problem in your workspace so it can be owned, tracked, and remediated, and so its effect on your risk and Cyber Resilience is captured automatically. Creating an issue also lets you connect it to the rest of your environment: the risks it contributes to, the controls meant to address it, and the program activities doing the work. This article walks through creating an issue manually. Issues can also arrive automatically from a connected tool (see Getting Started with CyberHQ Connect).
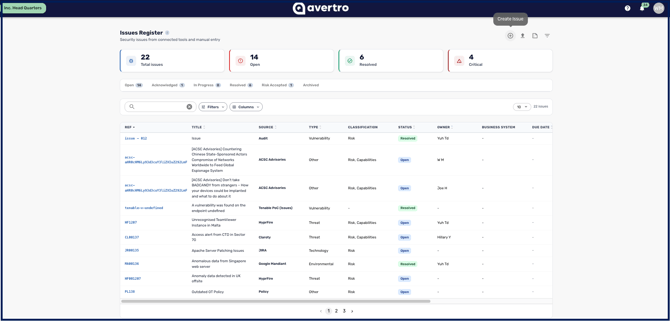
- From the left-hand menu, go to Catalogue > Issues and click Create Issue to open the issue form.
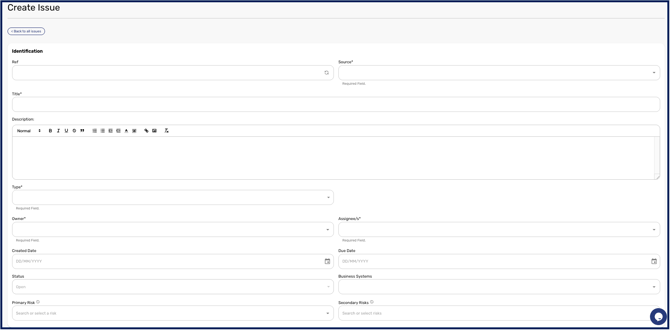
- Fill in the issue's Details: a Title and Description, the issue Type, an Owner and any Assignees, a Due Date, and the Business Systems it affects. These establish who is accountable and what the issue touches.
-
Add treatment actions under the Treatment Plan tab if you have them. Since Release 2.7 you can set a due date on each action as you create it, rather than saving the issue and coming back to edit it later, so accountability is captured from the moment the issue is logged. You can also optionally link each action to a program activity and a target status, so the activity advances automatically when the action is completed. Actions are still optional, so you can save the issue now and add them later if you prefer.
- Connect the issue to the rest of your environment. An issue can link to one or more Risks, to Controls from multiple frameworks, and to program activities under Strategies, all at once.
When you link risks, the issue inherits the category ratings of the highest-rated linked risk, which keeps your numbers consistent and saves re-entering them. Since Release 2.7, controls you link here are automatically carried forward to the relevant risk category, where they are used to calculate risk reduction. Linking controls accurately therefore affects your residual risk scores directly, rather than just recording a relationship.
Any value you set yourself is marked Manual and is preserved even if the linked risk changes.
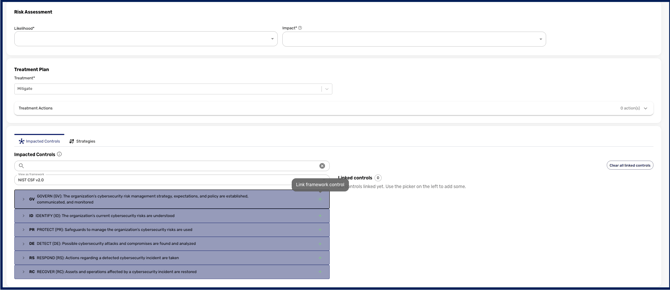
- Rate the issue under the Risk Assessment tab by setting its Impact Level and Likelihood Level, which together determine its severity. You can rate in Basic or Advanced mode, where Advanced gives a more granular rating and a correspondingly larger effect on your risk numbers. A source chip on each category shows whether the rating is Linked Risk, Manual, or Not Mapped, so you always know where a value came from.
- Click Save. Your issue is created with a status of Open and appears immediately in the Issues Register, where it begins contributing to your risk and resilience figures.
Issues can also be imported in bulk from a CSV (see How to Bulk Upload your Data via CSV) or automatically from a connected tool, rather than created one at a time.
With the issue created and linked, it is ready to be worked through to resolution. See How to Manage an Issue for the status workflow and day-to-day management.